It was a sad day for my brand new yoga mat that had just been delivered (and my promise to use it). Arriving back from my last trip to Iceland to find two packages had arrived for me, I was stuck with a dilemma:
Do I rip open the seal on my rubbery lying-down-aid and sit on it for a while, or do I unbox the pallet of new gear from Apple which contains my shiny Mac Pro and Pro Display XDR?

The yoga mat has remained in its packaging to this day. I’ve been busy…
The Mac Pro and Pro Display XDR, on the other hand – were out, unboxed, and ready to be put to work in 47 seconds flat.
Here I was, surrounded by that heavenly new technology smell as I peeled off each of the protective layers (geek-out). That was, until I realised I hadn’t actually planned on where to put this additional beast of a computer at home.
You see, with the Coronavirus Lockdown already heading our way (and, as it turned out, fully enforced a few days later), I hadn’t thought through the logistics of how to fit a third computer in my home office and still be able to get to my chair. No worries – this one looked good enough to sit in its very own special corner of the house, and that’s where it now lives.
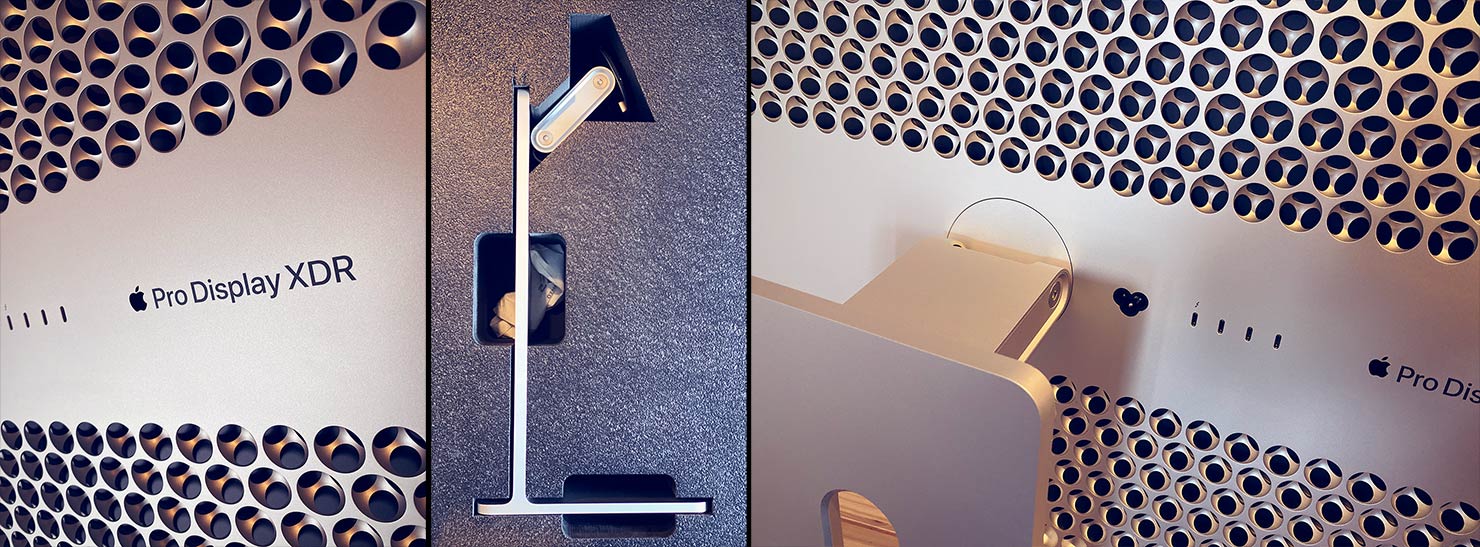
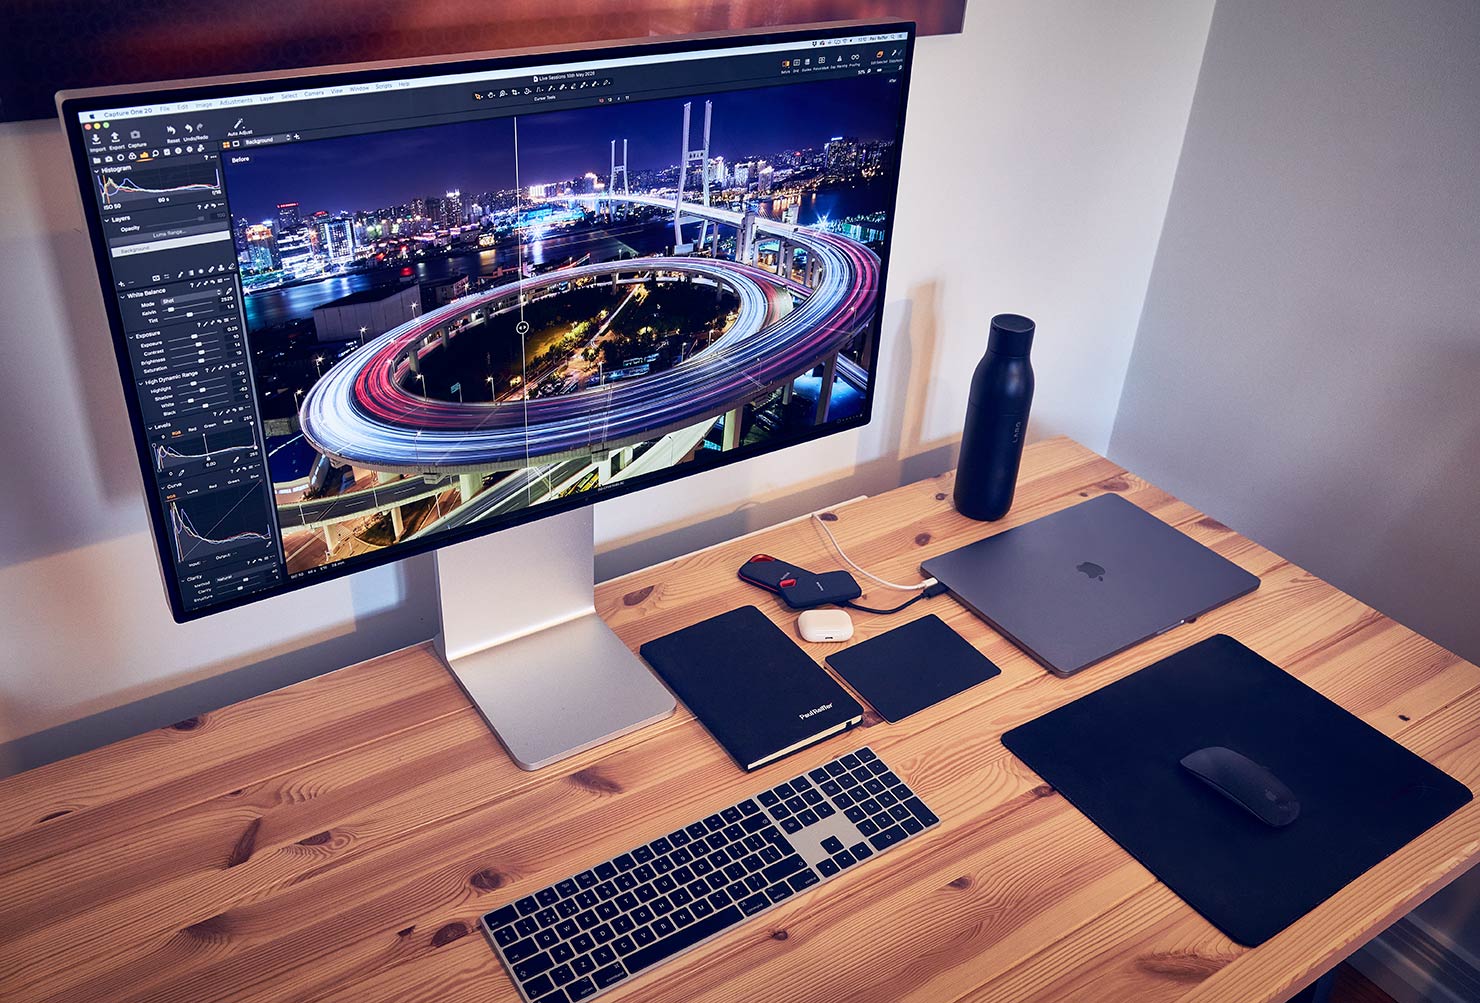
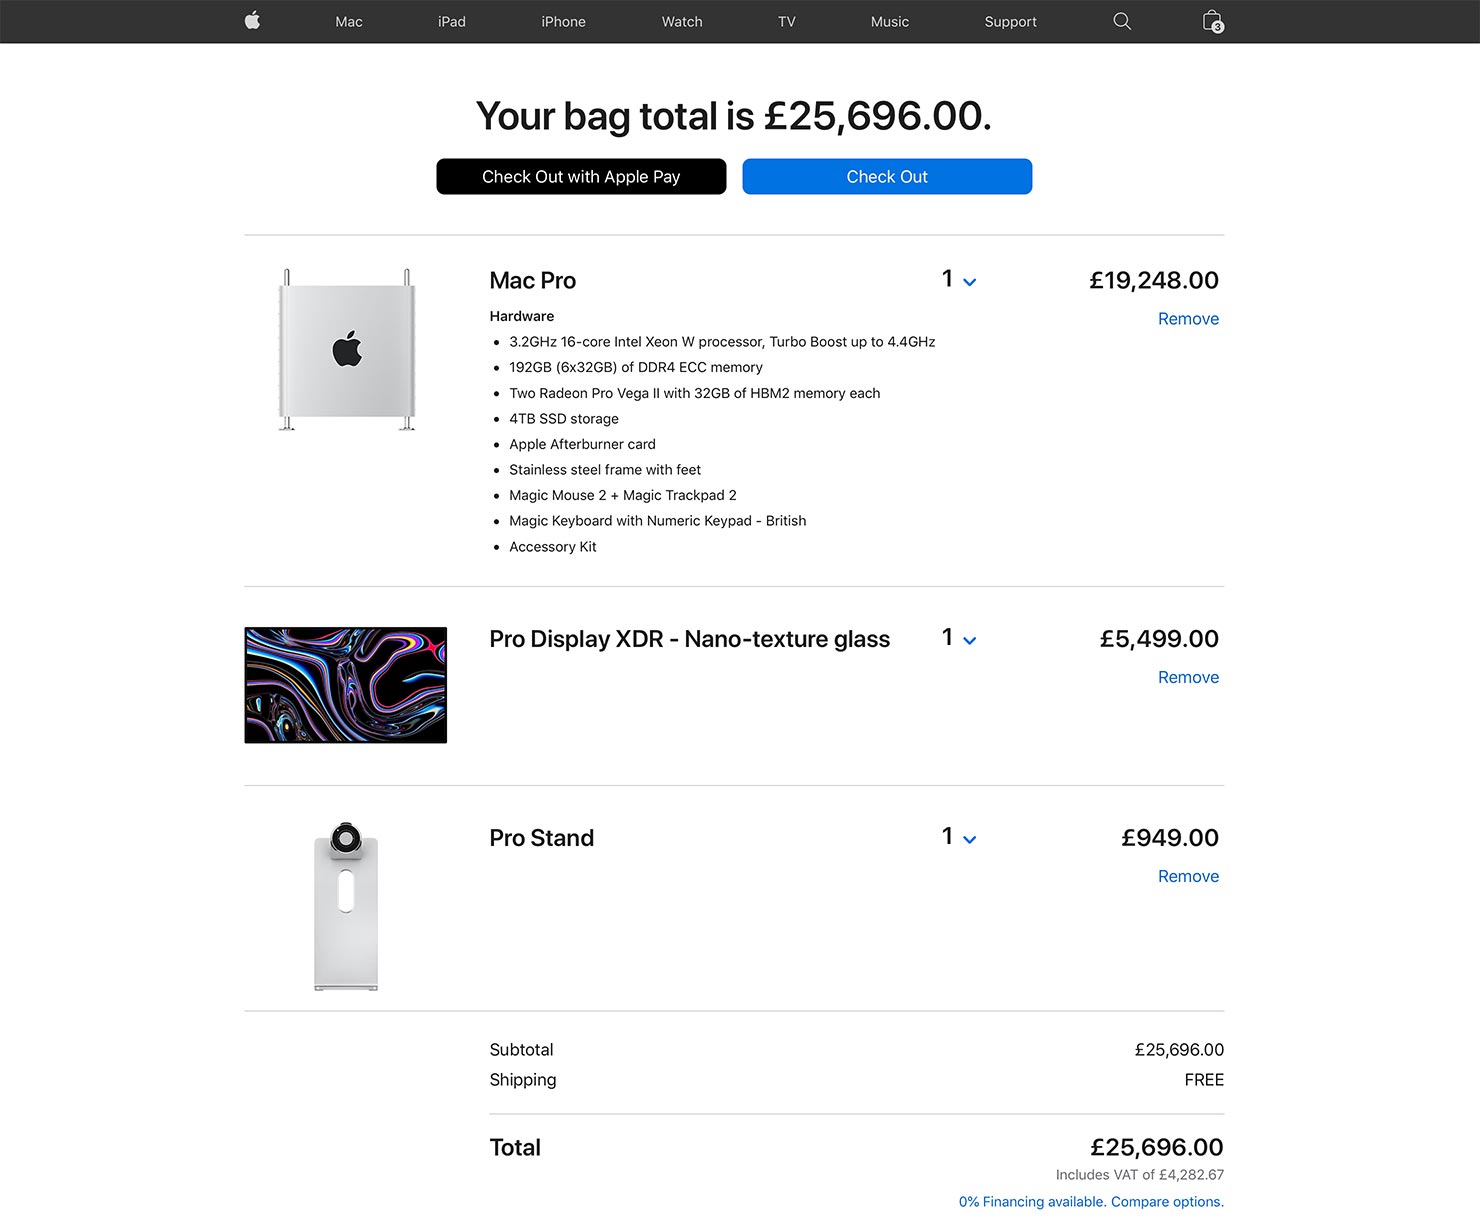
Pro Display XDR + Stand
While the 16-core tower was the star of the power-show, it was the new Pro Display XDR I wanted to get my hands on the most. Finally, there was a genuine large-format (32″) 6K Retina screen that would allow me to accurately edit my 150+ megapixel shots in true colour without having to constantly zoom in and out or “recalibrate” for every single operation.
I know the price point of the display came under a bit of online criticism at launch – it’s not a cheap option (but then, I wanted great, not cheap). However, it was the “optional” £949 stand that looked to be the more contentious addition to an already premium-priced screen.
But pulling it out of the box and getting everything set up, you could see why Apple were confident in their pricing.
The quality of this display is absolutely stunning. I’ll cover more of that later, but from the first moment it’s switched on, it’s a “wow” – as one of the brightest, clearest, most vivid screens I’ve ever seen, came to life.
Add to that, the styling and ergonomics, and it’s difficult to be anything other than instantly impressed.
That “expensive” stand – is simply perfect. With a full range of movement, the screen effectively “floats” in (literally) whatever position or angle you place it into with no effort at all.
With styling cues from the Mac Pro tower, these two have clearly been designed to live together and everything just “clicks”. Gone was my wooden monitor stand that my iMac needed to keep up to my eye level – the Pro Display XDR sits quite happily at my height, and all the way down to almost desk level for those who need it.
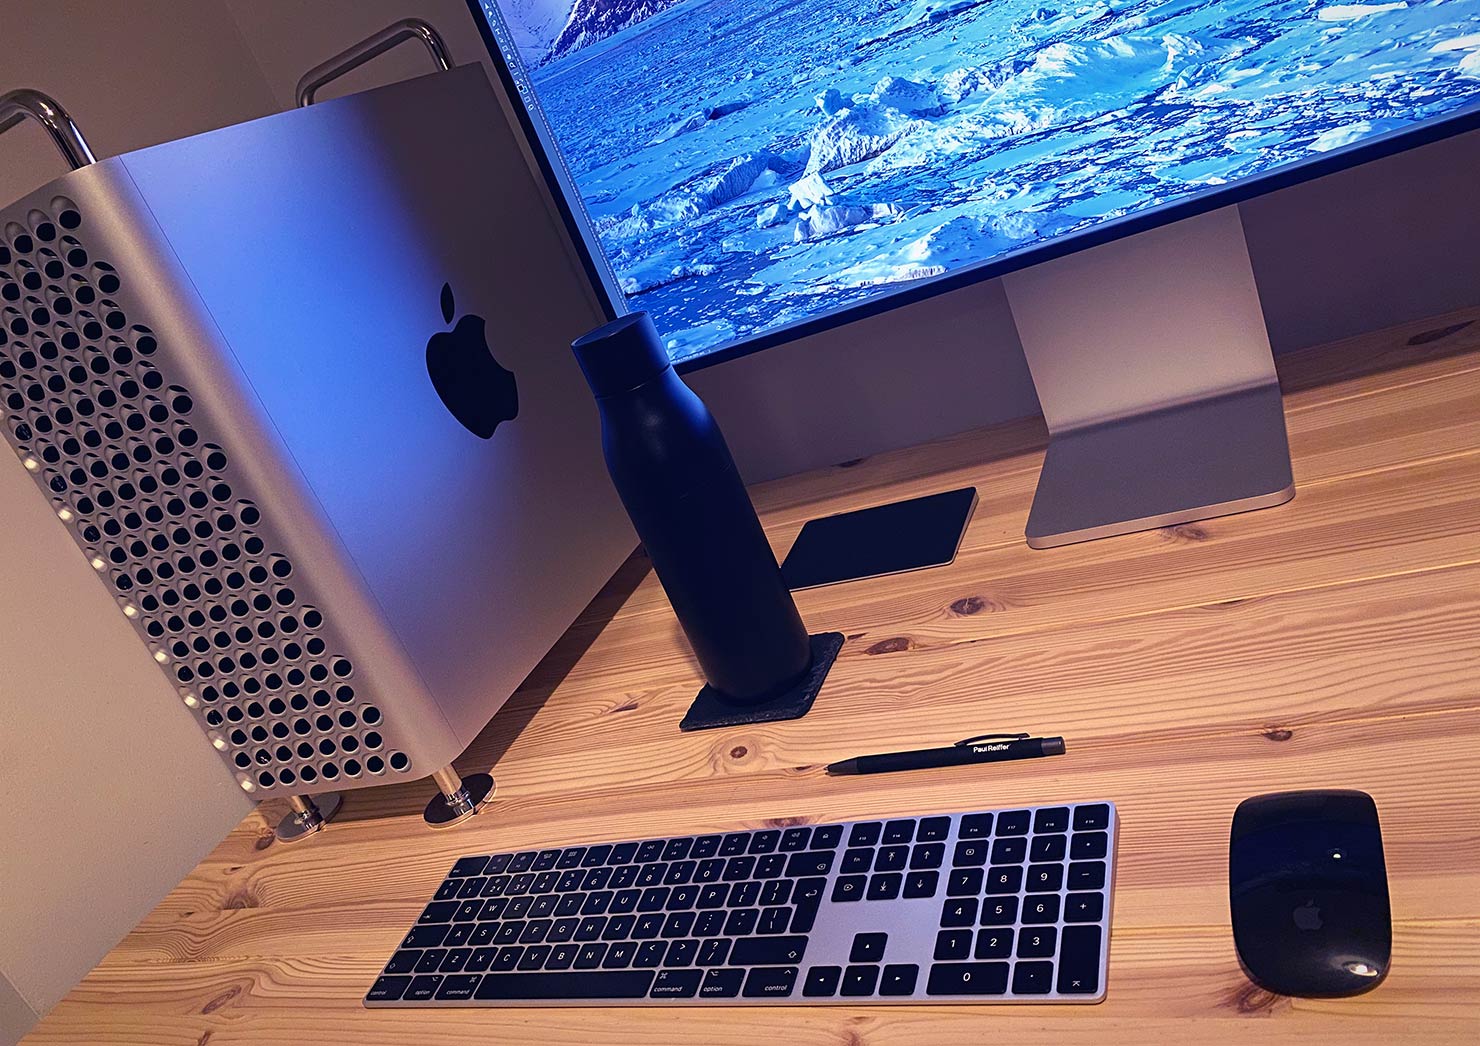
With the Space-Grey accessory pack, this was the neatest and most consistent look to a Pro setup that I’d seen. (And yes, I’m a fan of the fancy black cables too.)
Connectivity
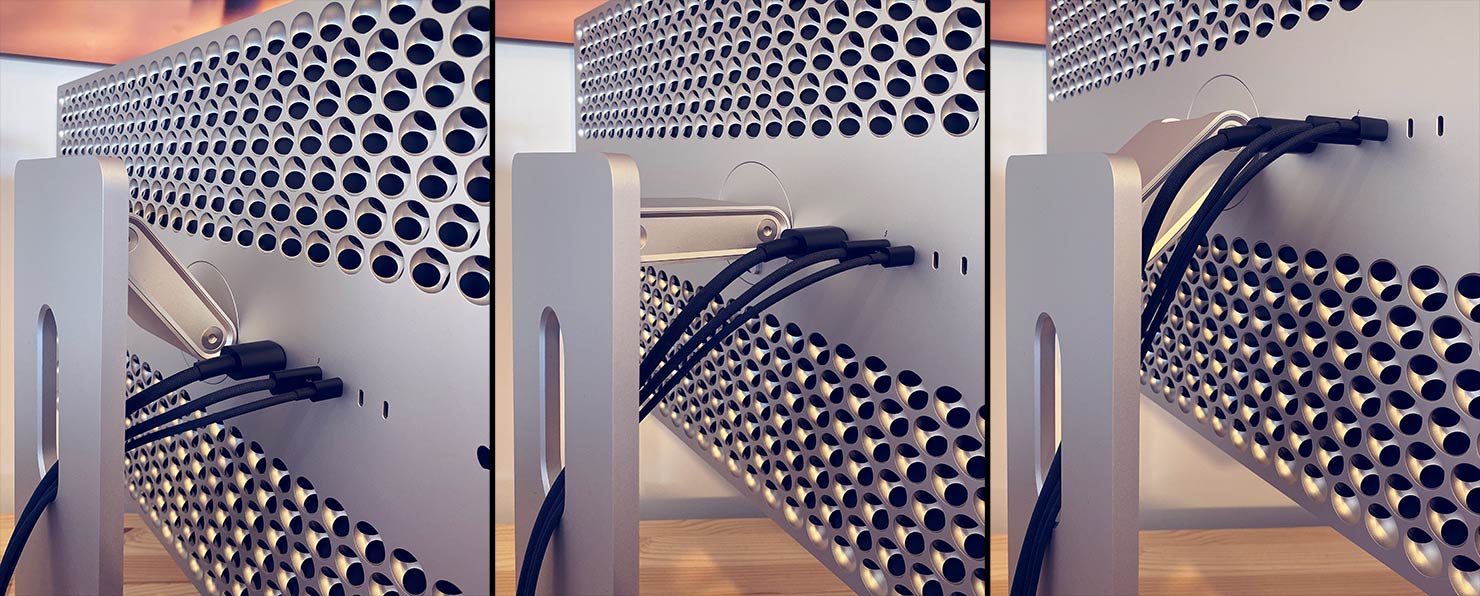
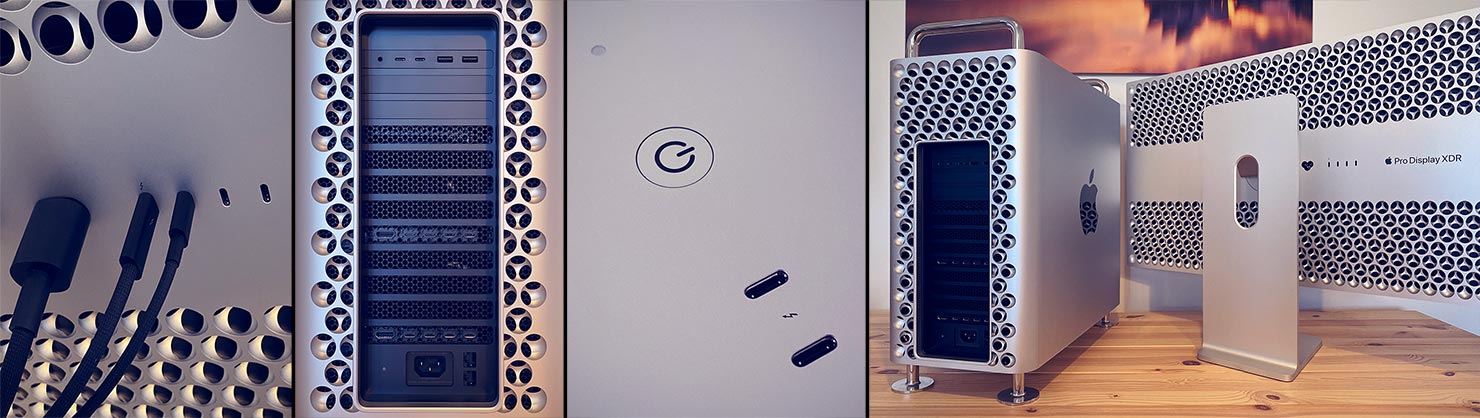
Speaking of cables – Ports!
Ports, ports, ports and more ports. Between the Pro Display XDR and Mac Pro tower, we have a mix of 16 USB-C / Thunderbolt connections, 2 “old school” USB-A inlets, twin HDMI ports (one on each GPU), two ethernet ports and – of course – a 3.5mm headphone jack.
So what, exactly is inside these two shiny beasts?
Technical Specifications
- 16-Core Intel Xeon W (3.2GHz – 4.4GHz)
- 192GB DDR4 Memory
- Two Radeon Pro Vega II Graphics cards with 32GB HBM2 each
- 4TB SSD Drive
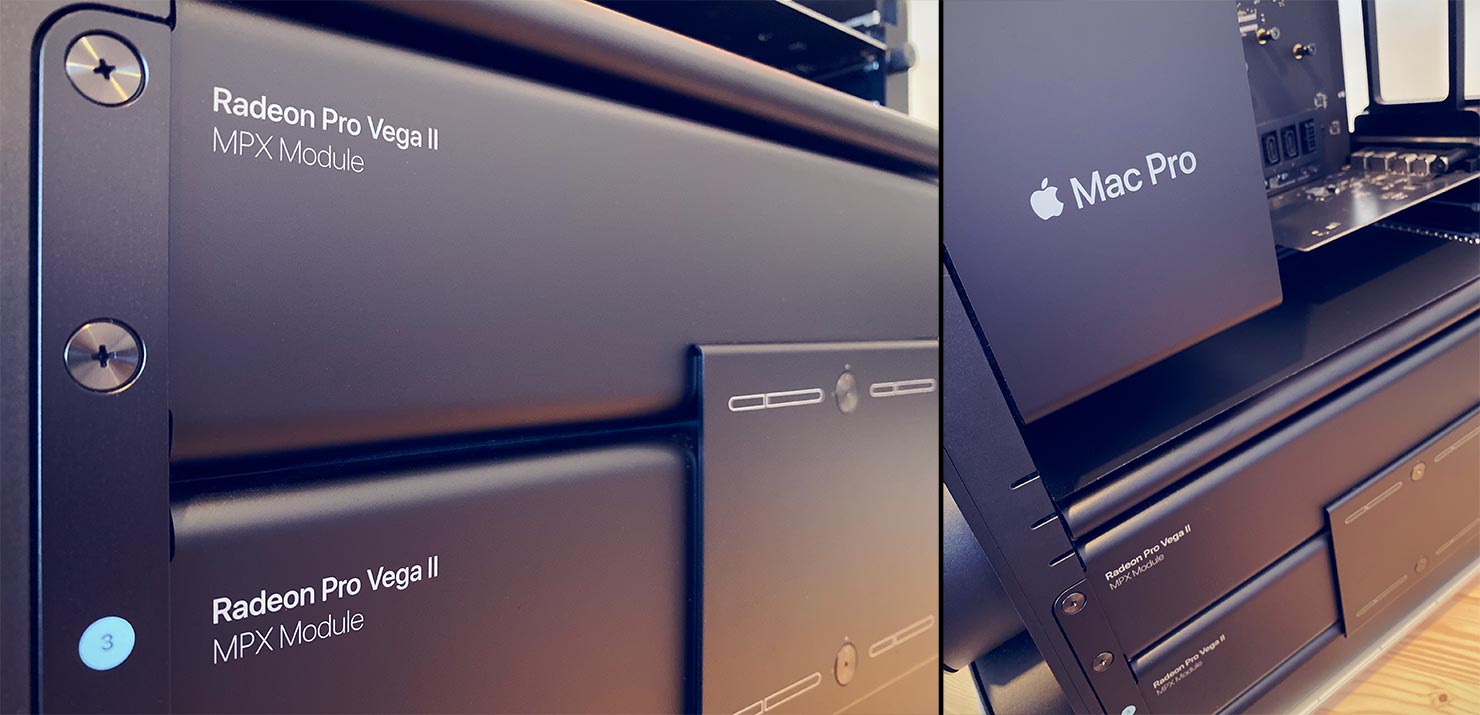
- Apple Afterburner Card
Apple Pro Display XDR & Stand:
- 32 inch IPS LCD Display
- 6016 x 3384 pixel Resolution (20.4 megapixels) at 218ppi (retina)
- XDR/Extreme Dynamic Range: 1000-1600 nits brightness
- SDR: 500 nits brightness
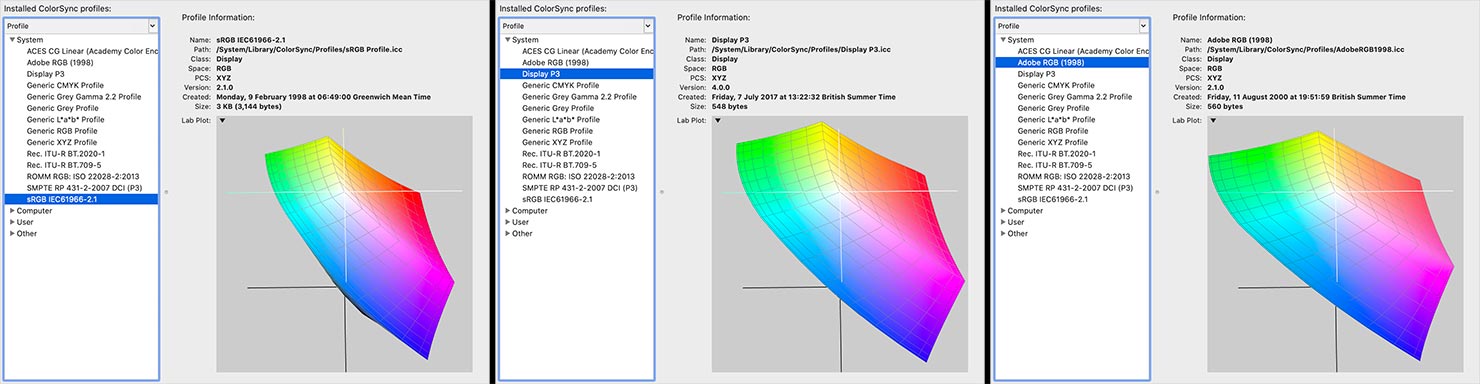
- P3 Wide colour gamut, 10-bit depth, 1.073 billion colours
- 5″ of Top position movement in portrait & landscape orientations
- 89º Viewing angle in all directions
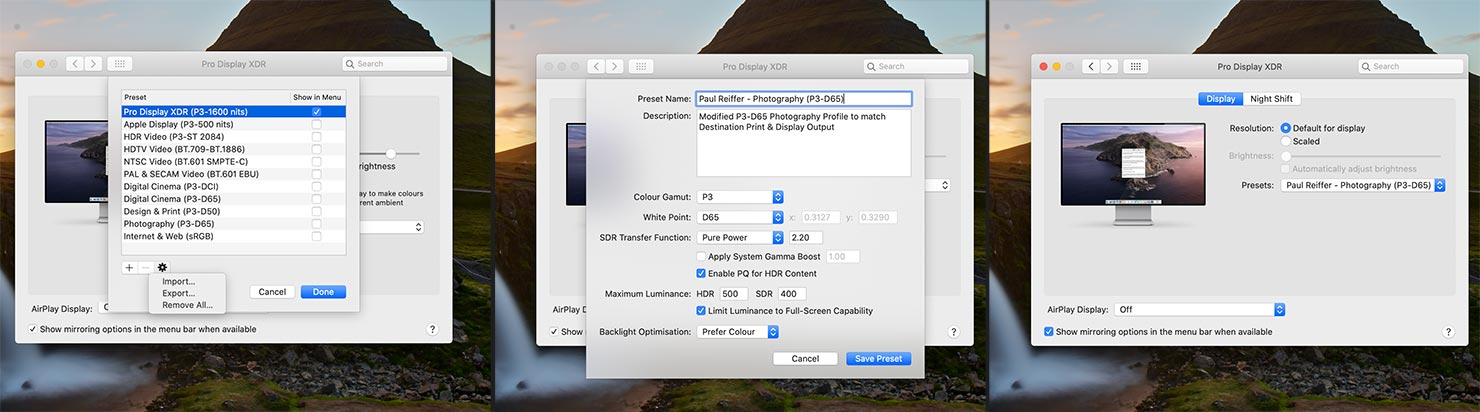
Display Setup & Colour Profiles
Investing in a display like this isn’t an overnight decision – and it has to be the right tool for the job.
First things first, while I love the “Auto-Brightness” and “True Tone” features on my MacBook Pro, this display is being used for consistent output, so both need disabling if you’re taking your editing in any way seriously. Having a screen automatically shift its brightness and white balance according to the time of day and ambient lighting is not a good place to start for reliable prints – so get those turned off immediately!

So what’s special about this particular display?
While I’ve used offerings from EIZO and LG over the years (along with the traditional displays on Apple’s iMac lineup), there was a very specific claim about this display that I was looking forward to seeing: Extreme vibrance, enhanced dynamic range and huge levels of detail.
You see, while the “print-accurate” screens out there (along with their clunky little “auto-calibration” arms and tools, etc) are fantastic in terms of holding an accurate and wide colour gamut along with low reflectivity – they’re really designed for printing on “normal” paper options, and that’s not how most of our images are seen.
Most of the time, we print using Adobe RGB 1998 as a colour space – but our pieces are typically face-mounted and lit extremely well when on display. Given the specific photographic paper we use, that all adds to the effect of making the image “glow” (almost like it’s backlit), so the emulation of a flat white Baryta or Photo Rag paper is almost useless to me on a screen.
Instead, I need my screen to be able to match our specific, chosen, output.
If that’s on-screen for online consumption, then it should be bright, vibrant, and limited to sRGB. If it’s for print, it should be vibrant, with a dynamic range that matches my Phase One camera, while full of contrast & details in a wide colour gamut.
And I don’t want to have to keep calibrating every time I switch!
So here is where Apple excels.
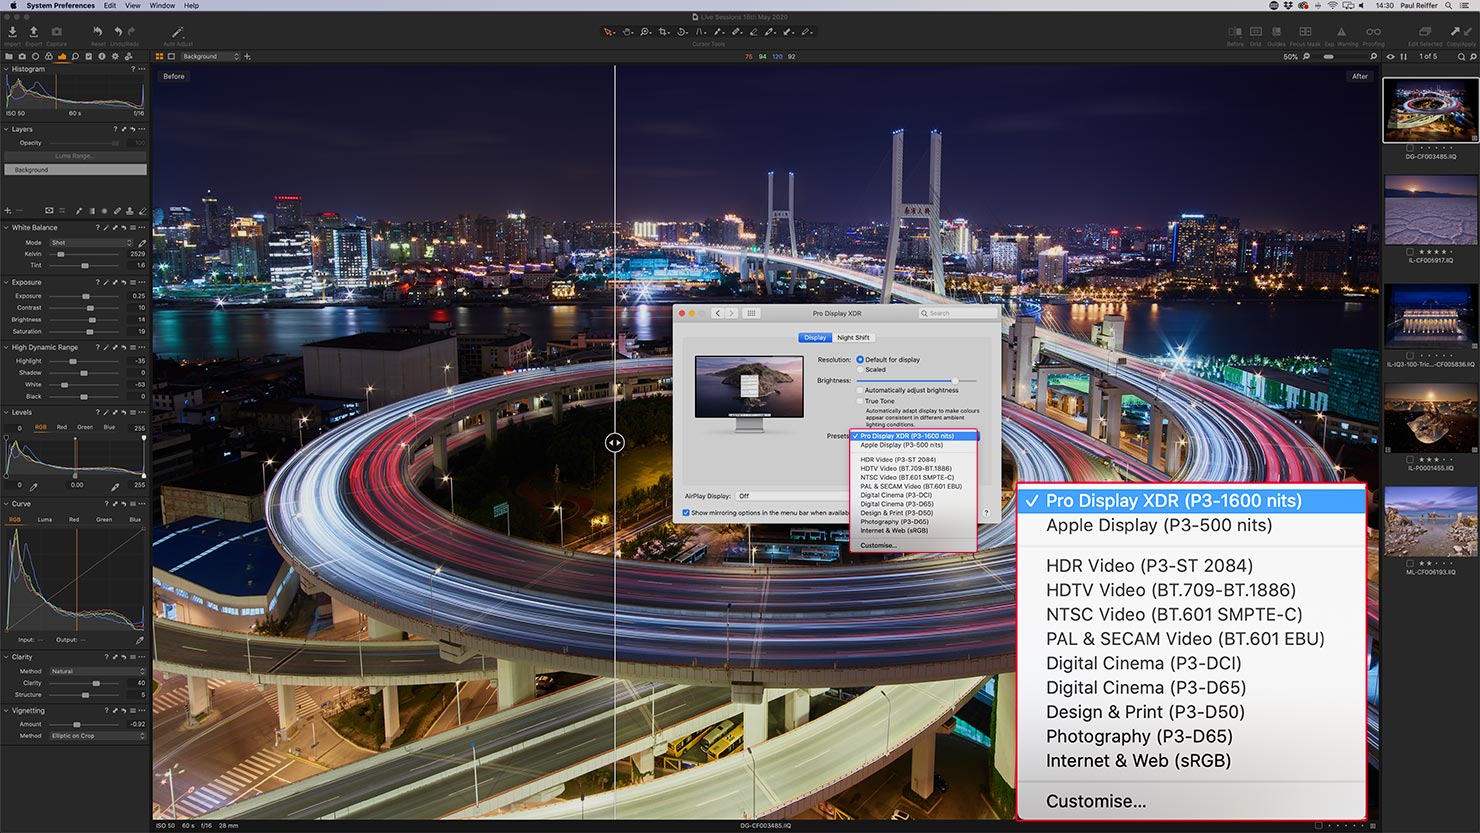
With the Pro Display XDR, there are two key modes – XDR (Extreme Dynamic Range) – which actually suits our prints with its 1600 nits of brightness and high contrast, and SDR (Standard) with its more “normal” 500 nits.
Both modes offer the same range of colour spaces (and the screen’s also capable of covering 97% of the Adobe RGB gamut), but there is no need for intervention when switching between any of the modes. Essentially, the screen has been tuned to be perfect right from the production line, for every possible combination.
To my surprise, when it arrived, I was limited to using one of the 11 modes listed in Display Settings. The “Customise” link only led to an option to re-arrange my favourites, with no ability to tweak or make adjustments to the stock profiles. I guess the argument was “why would you?” but it did feel like an omission.
Comparing 500 nits SDR to 1600 nits XDR
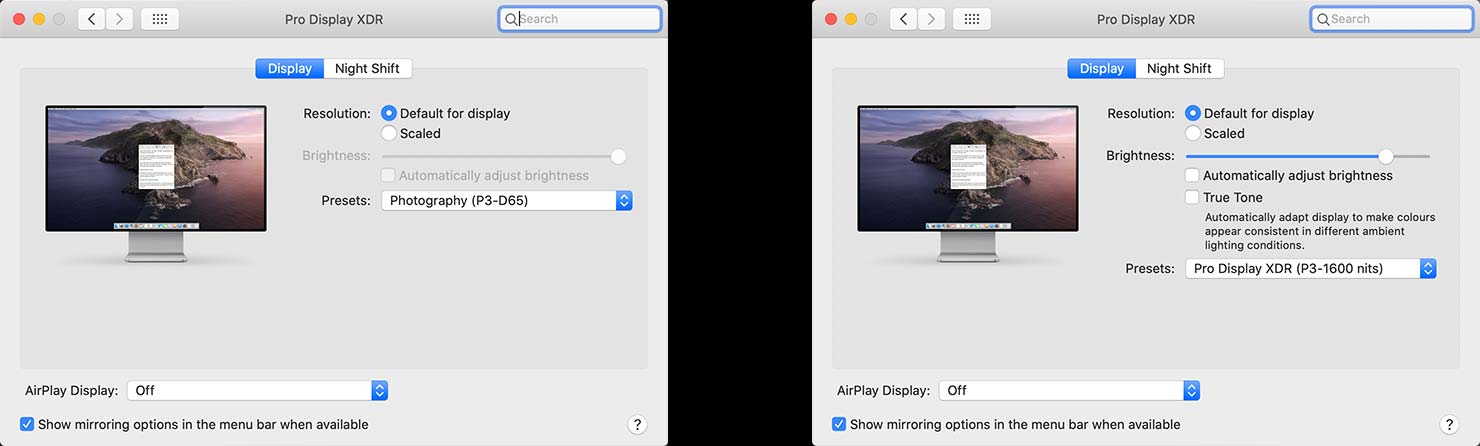
I wanted to compare the two key modes for my specific workflow – Photography (P3, SDR) and Pro Display (P3, XDR).
Photography would be my reference for “pure print”, with no lighting control. “Pro Display XDR” would be my reference for “face-mount” gallery images and on-screen renditions.
It’s obviously not possible to compare these with the standard in-system print-screen function, as the input produced for the screen is identical, regardless of display mode chosen. Instead, I hooked up a camera across the room – set to 100% manual – and took a comparison shot between the two modes with no tweaking.
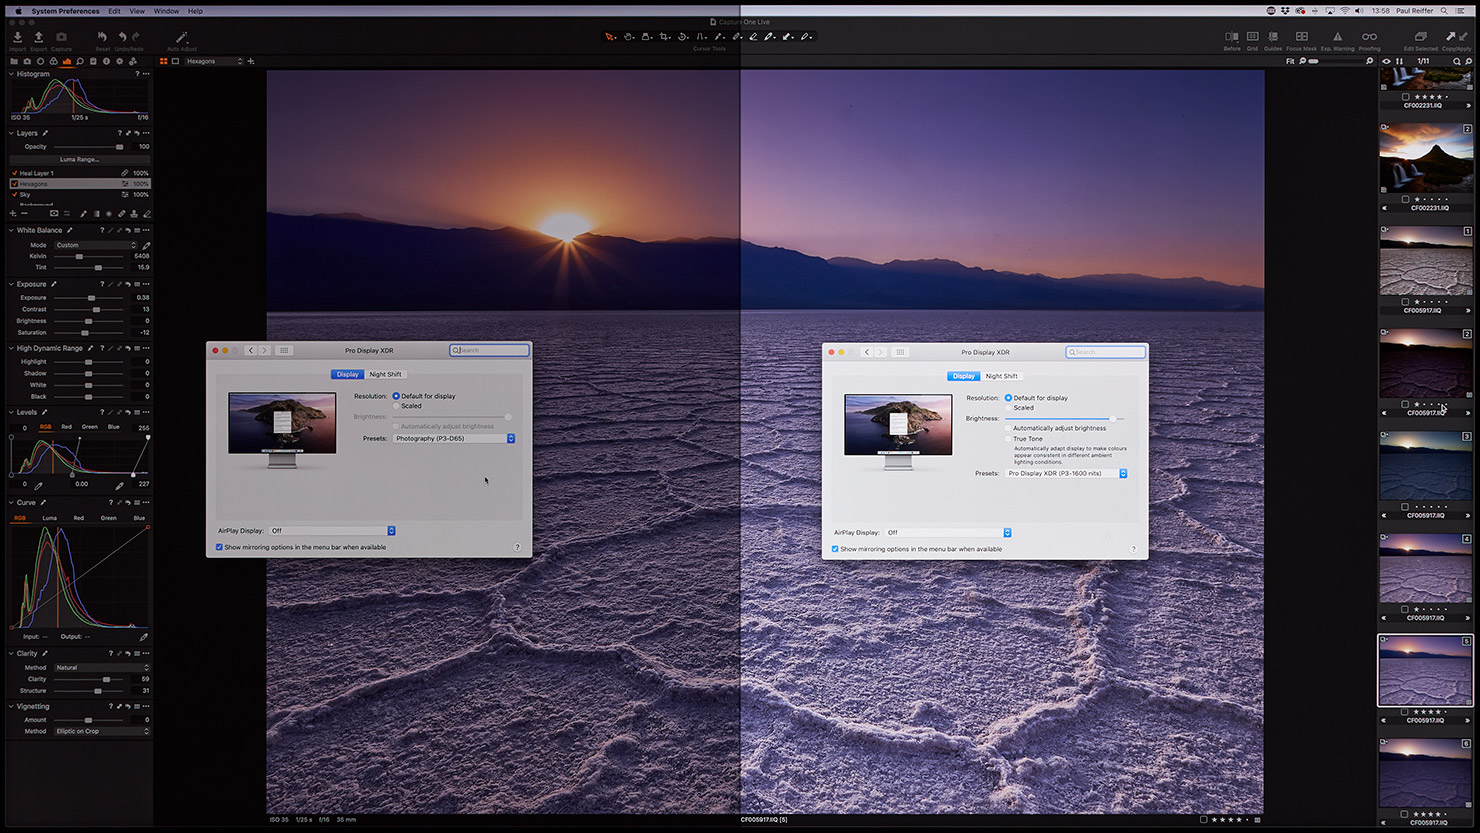
What a difference 1100 nits makes!
The “Photography” profile obviously looks a lot dimmer when comparing, but I can say when you’re sat in a room using that setting it’s plenty bright enough. Colours are accurate to standard paper print output (I’ve now successfully tested this) with smooth gradients and tones which are constant throughout each image.
But it’s the “wow” of the XDR setting on the “Pro Display P3” profile that really made things pop. In the same way as our Gallery Acrylic prints display under light, the on-screen images (and prints) show off the very best of the dynamic range, vibrance and detail that our images capture from locations around the world.
Perfect!
Well, almost…
March 2020 Firmware Update
I’d like to think it was my personal telepathic link to Apple that did it, but I have a feeling it may have been in their roadmap all along. At the end of March, Apple quietly released a new firmware update that gave more granular control to owners of the Pro Display XDR.
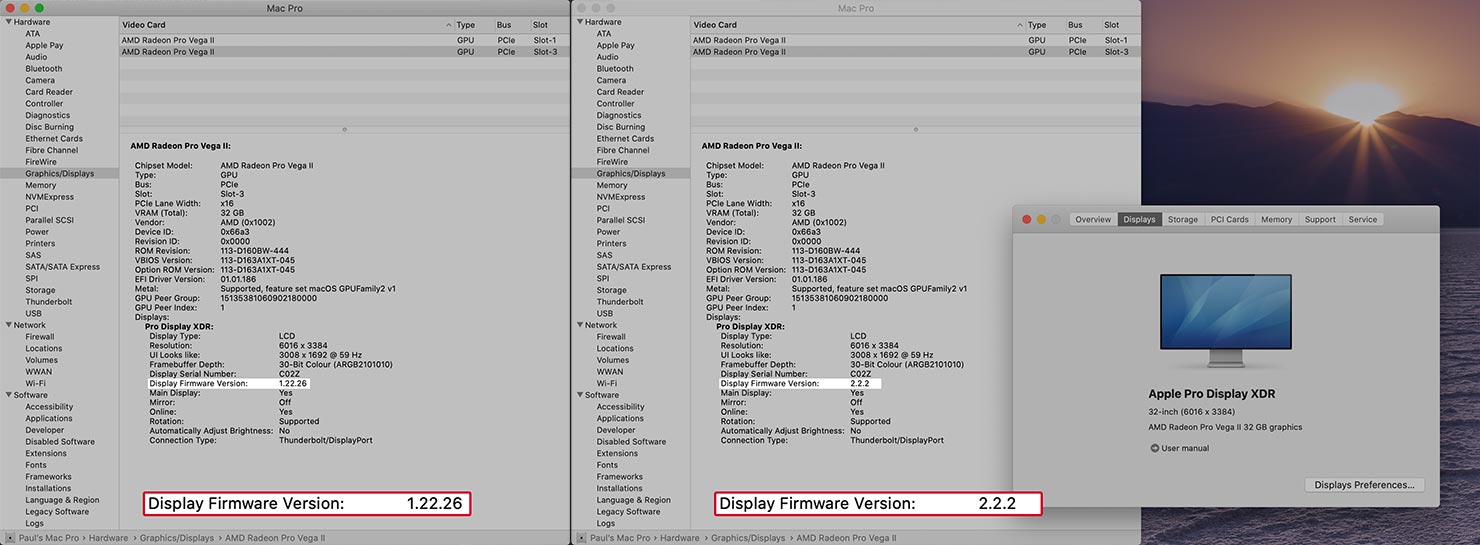
With version 2.2.2, that “customise” menu had expanded to allow me to create my own reference profiles, manipulate Gamma, decide on luminance levels to match output, and alter white points for any given profile/preset.
As mentioned before, working within the P3 colour space gives the screen a much larger range of colours than a standard screen’s sRGB offering – but the key thing for me was combining it with ultra-high resolution and amazing levels of luminance – in a box that just works.
Inside my Mac Pro
Speaking of the boxes that “just work”, it was easy to forget about the beast that was powering this stunning display.
While surprisingly quiet, I did notice our energy smart-meter start to panic when I walked in the door with the shiny new computer, so it was time to see what was running things inside.
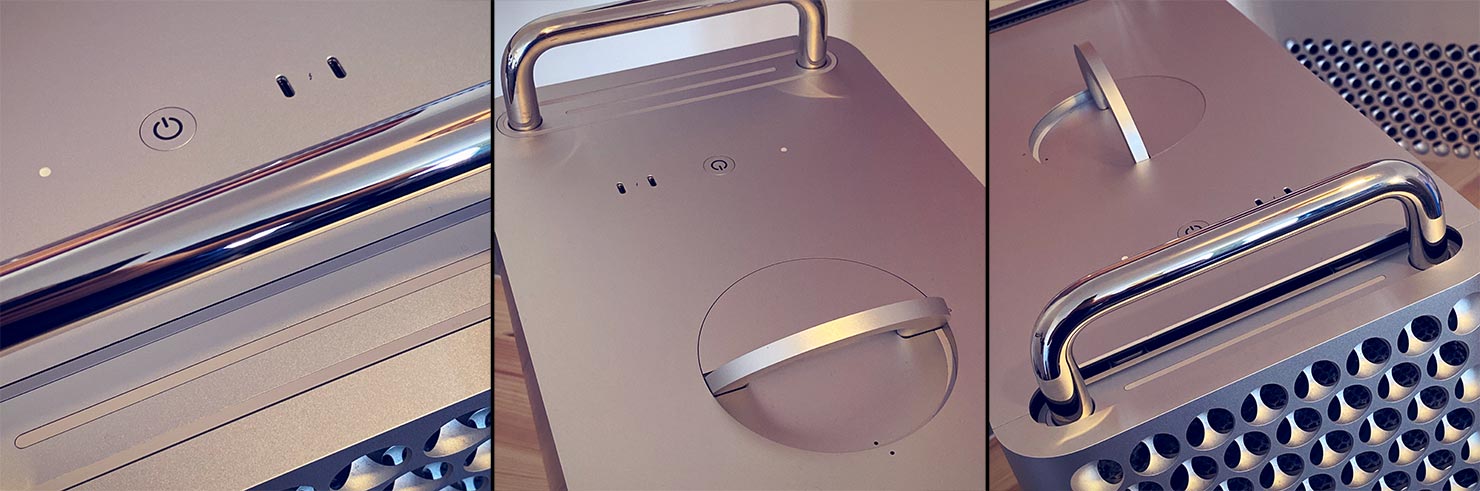
Everything’s been thought about here in terms of layout. From the awesomely simple way of opening it all up, to the minimalist setup inside, this is clearly one of Apple’s trademark products that look stunning both inside and out.

Cooling is key when dealing with such powerful systems, hence the “cheese-grater” inlets all around the metal chassis. But it’s the 4 monster (yet strangely silent!) fans inside that ensure there’s no way this crazy machine is going to overheat anytime soon.
As someone who remembers the old “Mini-Tower” PCs I used to self-build in the 1990’s, and their insides full of chips and cables, this was quite a remarkable sight for me. A desktop computer that took the phrase “modular” to its literal extent.
No untidy wires, no exposed chipsets, no “make it fit in there” approaches – each and every component has its place with not a single cable tie in sight.
On the right hand side, we find those two lightning-fast Radeon Pro Vega II cards, each with 32GB memory and the dedicated Apple Afterburner card slotted just above. That card is added to handle all dedicated ProRes video tasks – taking the strain away from the processors and GPUs while it quietly works away encoding and decoding content.
With all that power inside, it was time to put the box through its paces.
Performance & Capture One
Capture One can be a rather fickle princess when it comes to hardware at times – requiring the right amount of GPU power to really make the actual process of working on an image appear seamless and refined.
Holding such a large amount of processing capability inside, there were a few tests I wanted to try – the first, a task involving pure CPU and RAM: Preview generation.
Now, regardless of what anyone (incorrectly) tells you, initial preview generation in the current version of Capture One doesn’t even touch the GPU/eGPU in any way, shape or form. It’s pure processor power and memory that pushes this activity through, and that was what I wanted to see.
Loading in 444 images – each one a 151 megapixel, 16-bit RAW Phase One file – into a catalog and asking Capture One to generate full-scale previews at 5120px is a demanding task for any machine, but one we have to do after every shoot…
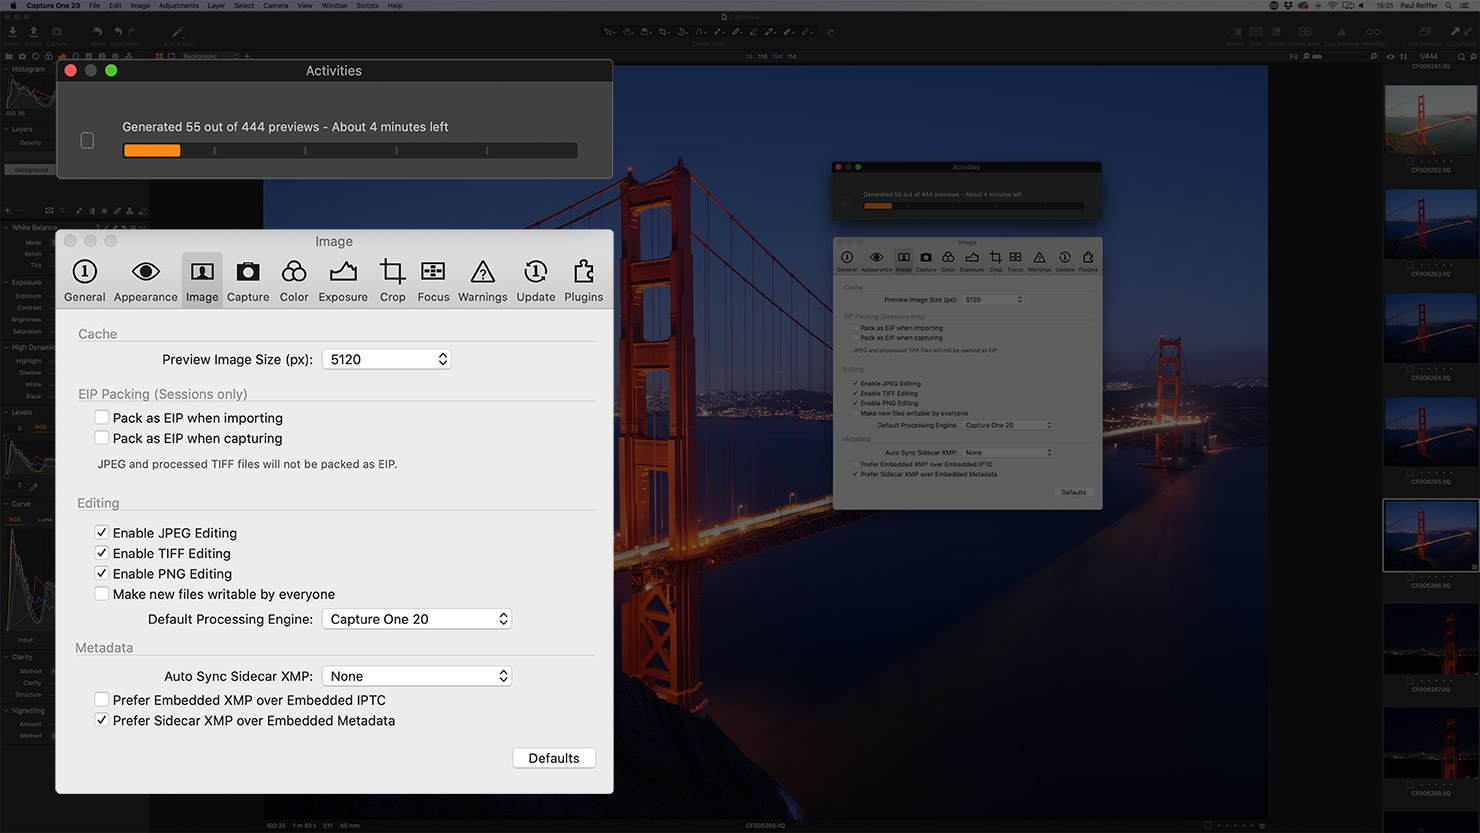
…and I now look at all the time I’ve previously wasted, waiting for my other systems to complete this process while the Mac Pro ripped through them at a rate of around 2 per second, completing in just over 4 minutes.
Comfortably assured that the processor could handle whatever was thrown at it in a somewhat “zippy” fashion, it was time to put that GPU power to use, alongside the processors, with a Focus Stack.
Using Helicon Focus with 151 megapixel files, it’s easy to sit and watch the world go by as it crunches through all the sharpness data to merge a stack of images into one. With my new system, however, I didn’t even have chance to grab a Diet Coke before it returned as complete from analysing and rendering the final output from 17 images.
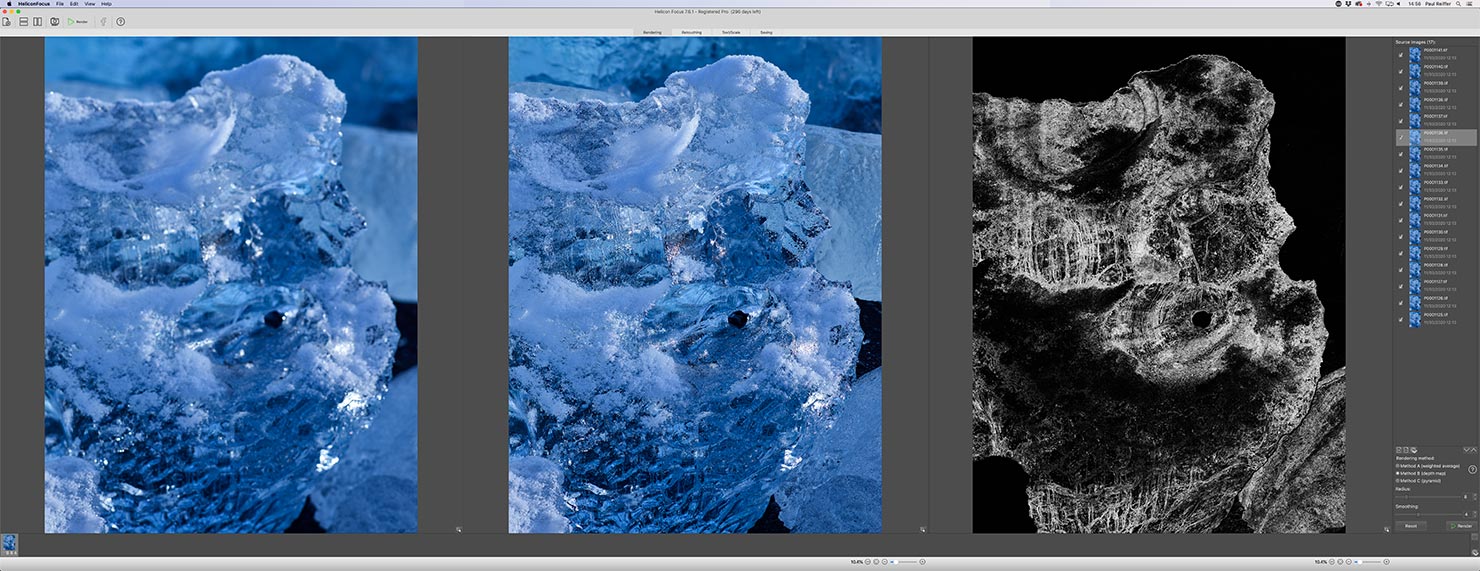
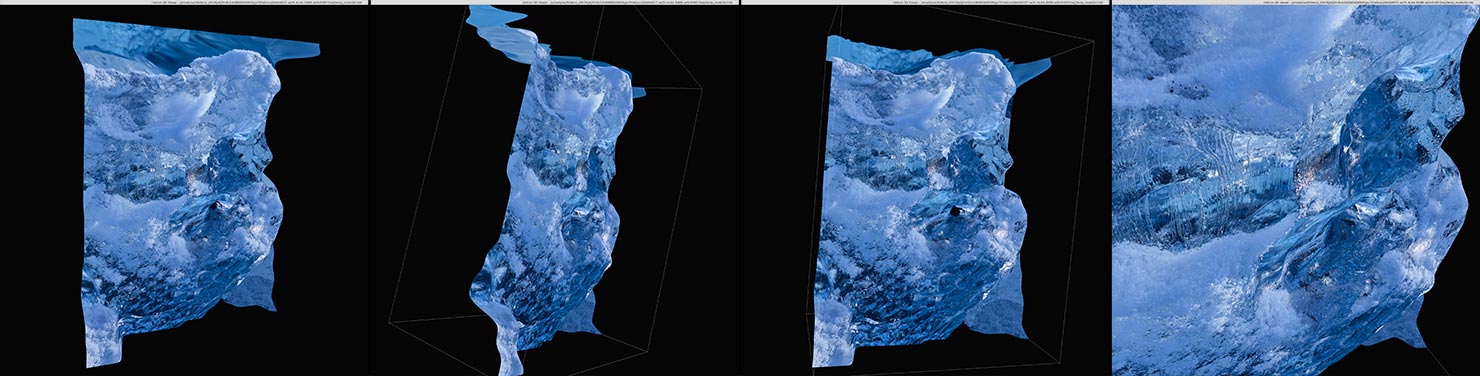
Just for fun, and to try something that the 8GB Vega card in my iMac would often struggle with (while pushing its own 5k display), I hit the 3D tab.
I was treated to instant rendering, perfectly smooth movement, fluid zooms, the works – all on that same 17-image 151 megapixel stack, in real-time.
So, given that success in Helicon, how well would Capture One Pro make use of all that dedicated Graphics Processing power with OpenCL enabled…?
Not that well, as it turns out.
(Gasp!)
Well, to clarify, in order to really push the GPUs I forced Capture One to process (not just import and preview) 82 medium format images, over and over again, at a range of different scaled resolutions – from 600 to 630 megapixel outputs (up to 29020 x 21770 pixel 16-bit uncompressed TIFs).
This task would get Capture One to specifically call on the GPUs for help, and grab as much power from the system as it could.
Or so I thought…
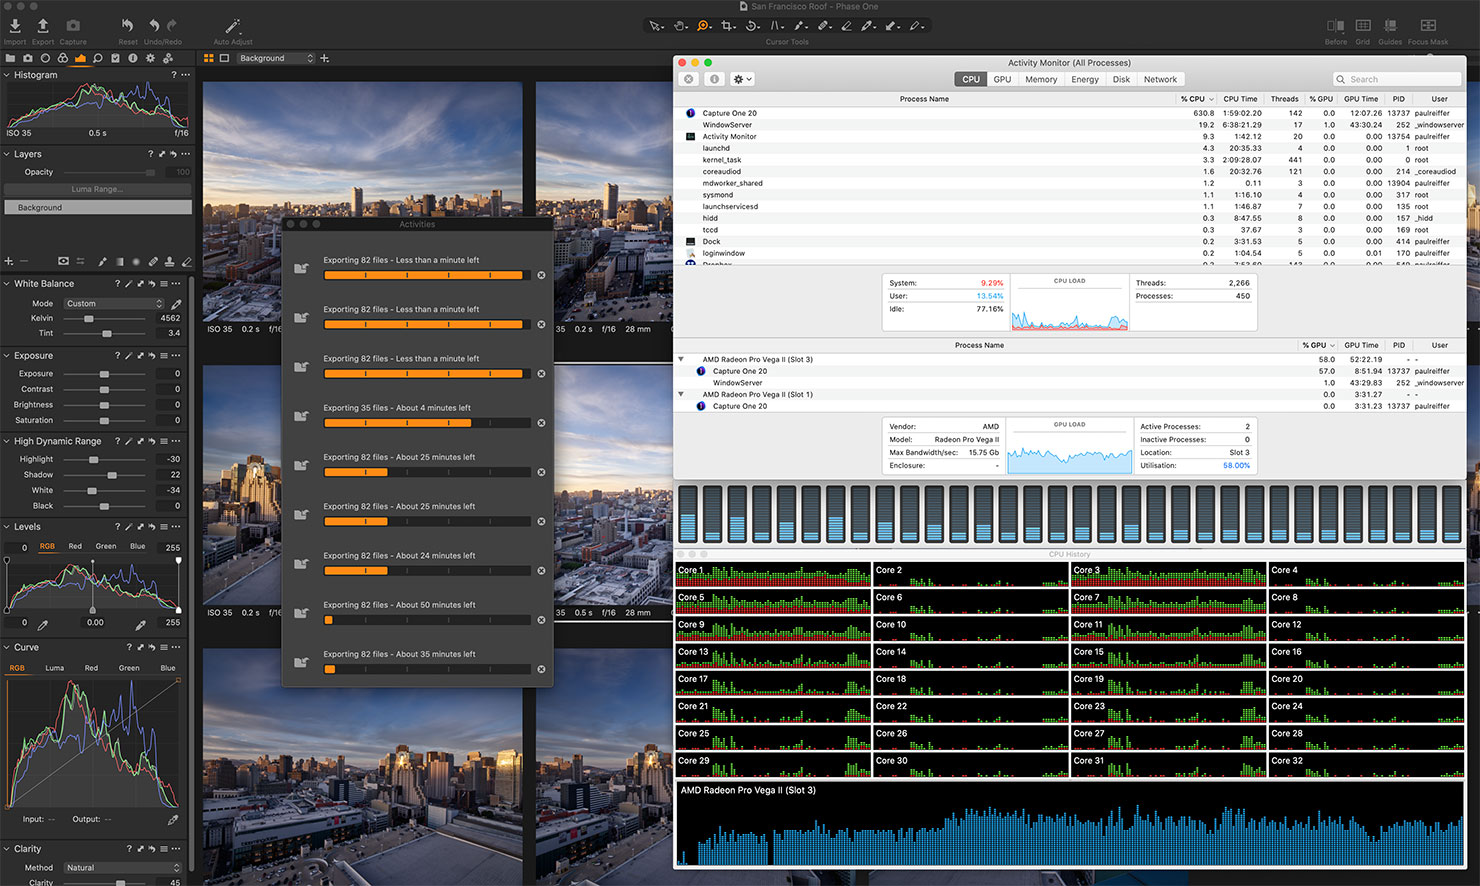
Now in fairness, I need to point out that Capture One processed a total of 691 images, that ranged from 3.7-4.1GB in output size, ultimately generating 2.67 terabytes of TIF files onto the 4TB internal SSD – in 43 minutes.
That’s incredible.
Simply incredible, in terms of pure processing speed.
BUT – it completed that entire task using an average of only 30% of CPU power, 60% of the first GPU and 0% of the second. At the same time, system memory never hit above 116GB in total utilisation. (Screenshot above.)
Imagine how quickly it COULD have finished processing, had it made full use of every ounce of power in that box.
It seems that while the general rule is to throw all the hardware you can afford at Capture One to make it run at its best – there comes a point where it’s just not (currently) capable of taking advantage of the extra it’s given.
Granted, that’s a pretty high point to hit, and for completeness I’ve already spoken with Capture One about it – the consensus being that there’s some work to be done to optimise for such systems. It’s just a shame it wasn’t able to use all that power, right now, out of the box.
On a positive, however – the whole time that operation was going on, I was able to use the system as normal (if I wanted to, anyway) with no loss of performance at all from what I could see.
And let’s not forget, this is a system that managed to produce 2.67 terabytes of 16-bit TIF files in 43 minutes flat.
Screen Real Estate + Multi-Tasking
Now one advantage of Capture One leaving some resources behind (although I suspect it would be fine, even if it didn’t!) is that this system literally feels like I’m running 4-5 separate computers at a time.
For our Pro-Tips videos, the system crunches through the full 4k renders of our screen recordings in minutes, but it’s the Live Edit sessions where I’m really impressed.
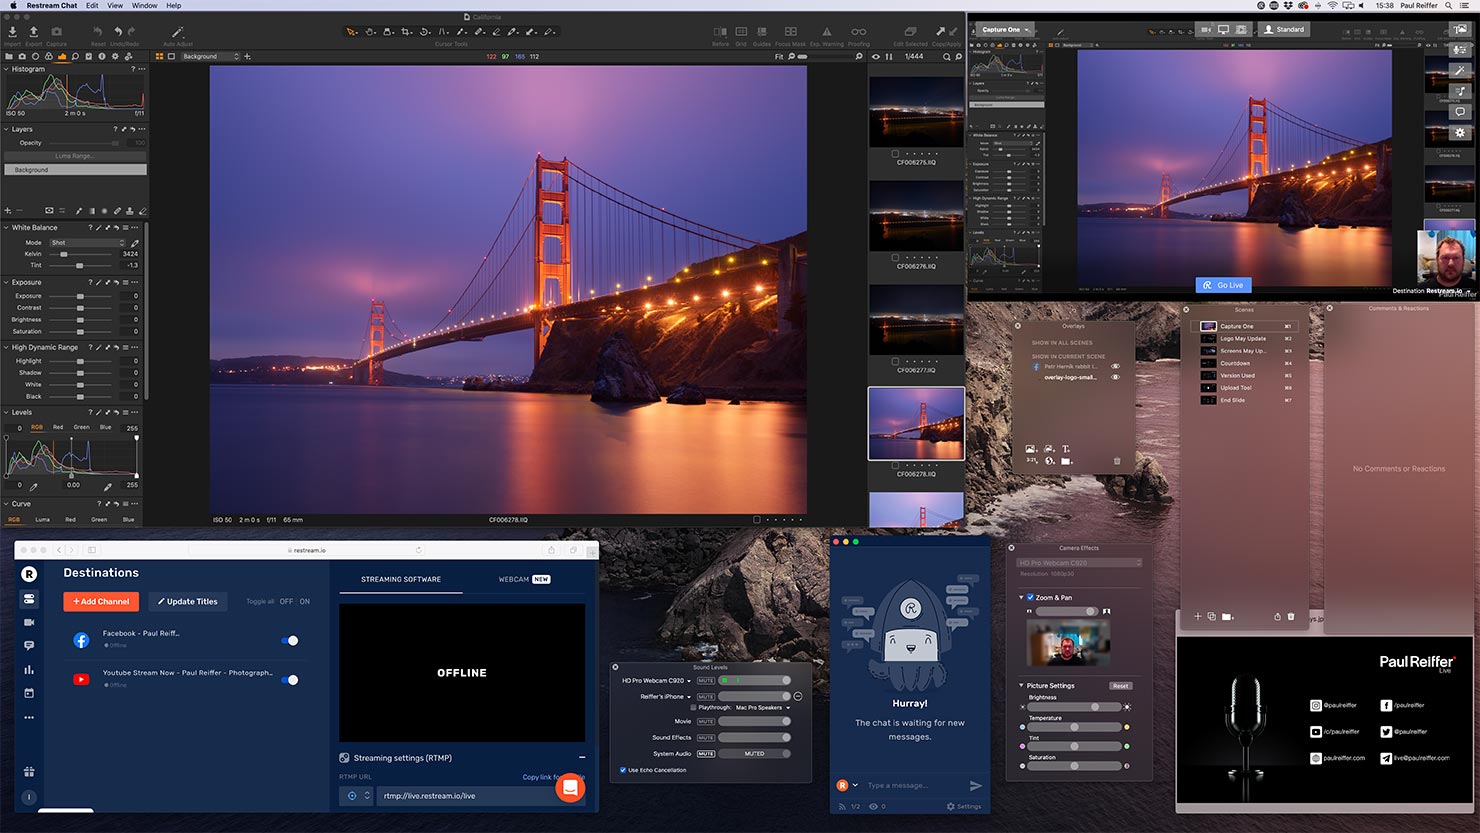
Running at max resolution, I have a full 4K raw image editing window open for recording, with live Skype streams from guests such as David Grover at Capture One, joining my own camera window. We have live output monitoring, offset stream monitoring, overlays and queued scenes – all active while editing huge files in real-time – things that I see many people online complaining “killed their computer” while this system doesn’t even blink.
And look at all that SPACE.
While the 27″ iMac’s 5k display offers 5120×2880 pixels – due to the retina effect, it runs best at a perceived resolution of 2560×1440. I’ve pushed ours to the maximum effective 3200×1800 setup, and while the extra real estate is appreciated, it can be a strain after a while.
The Pro Display XDR runs at a 6016×3384 pixels – meaning its default 3008×1692 gives me a very similar amount of resolution but at a much, much, more comfortable perceived pixel size and clarity…
MacBook Pro External Screen
Of course, you don’t necessarily need the power of the Mac Pro tower itself to run the new Pro Display XDR.
Plugging in a suitable MacBook Pro (recent models with a Thunderbolt 3 port) yields the same display options (while also charging your laptop) albeit with a slightly less powerful processor behind the scenes.
Just be aware that even those maxed out 8GB GPU MacBook Pro models (but certainly the lower spec versions) may struggle with some tasks. After all, you’re asking them to power a 6k 30-bit screen while also pushing 3.5x (16″) or 5x (13″) the pixels of their own native screen – so the addition of an eGPU might not be a bad idea.
So what about the price tag?
Well, yes, inevitably these systems are at the decent end of the investment scale.
The only “non-essential” in this system, for me, was the Afterburner card – as we’re not yet coding ProRes RAW video – but may well do in the future.
All the other components, I’d say are the right side of “future proof”, bearing in mind the Mac Pro system is inherently designed to be user-upgradable as requirements grow.
My hope is that Capture One is soon optimised to take advantage of the second Radeon card – as without that demand, while other applications are flying, it’s a bit of a shame that we’re not getting the full benefit of all that power for now.
The Pro Display XDR is an absolute winner for me.
Yes, there will be those out there that cry “there are better calibration tools” or “wider colour gamuts” on other screens. However, when my priority is being able to see ultra-high resolution landscapes accurately displayed in a way that matches the format in which we print them for sale – that argument doesn’t work for me, especially when this display from Apple does it so well.
I need a system that displays my content in the most accurate way to how I deliver it – with the power to produce each of those images quickly.
Between my new Mac Pro and Pro Display XDR – I’d say I’ve found it.
Plus, it does come with free delivery…