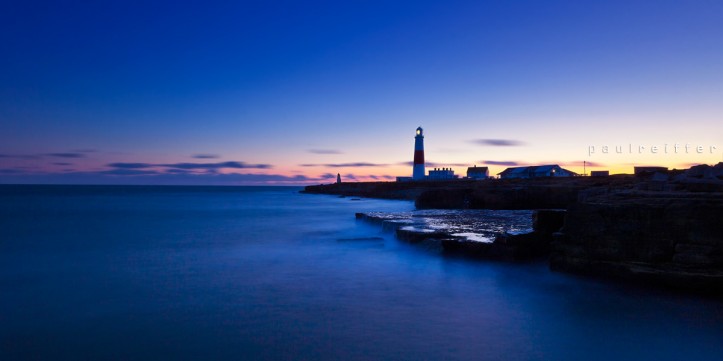
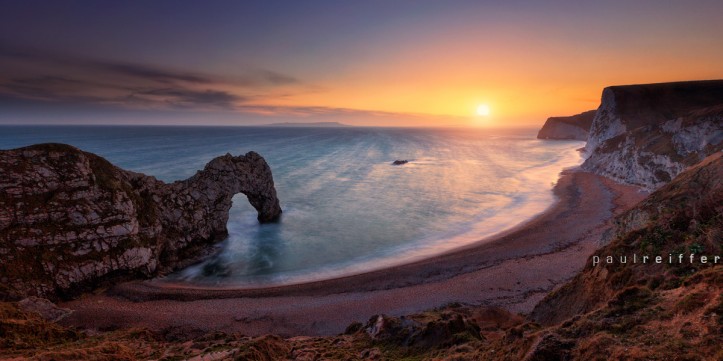
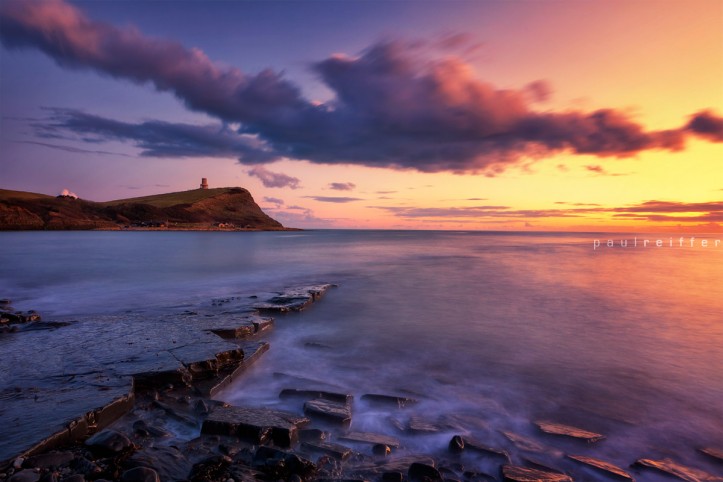
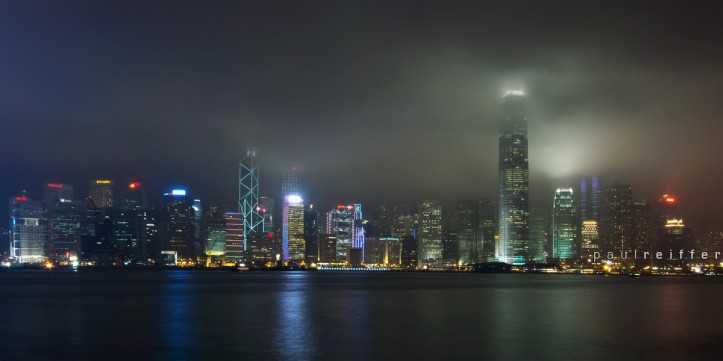
Quick question: What do the following images have in common?
The simple answer? They’d be impossible shots to take without some form of filter – and in this particular case, a filter which many people misunderstand or simply don’t think they need. That is, until they understand the power that it can have when shooting landscapes. It’s also one of the most frequently asked questions of land/seascape photographers – “how did you manage to do that to the water?”
Allow me to introduce, the star of the landscape photography show: The Neautral Density Filter (and it’s sibling, the ND-Grad!)
The ND/ND-Grad filter adds a “tweak” to the relatively powerful tools photographers have onboard their cameras, but it can really mean the difference between a “stunning” landscape shot and a “what I see right now” image. You see, the challenge with landscapes is that of light – well, too much of it, anyway – especially at sunrise and sunset (not that we’d ever want to photograph at those times, eh?) Photographers have pretty much 3 key things they can play with to determine the look of an image : Aperture (“f-stops”), Shutter speed and ISO.
- Aperture controls how much light is let through the lens onto the sensor/film (and also, as a result, the “depth of field” – or how much of the image is in focus).
- Shutter speed, the amount of time the sensor/film is exposed to the light flowing through the lens.
- ISO is the standard for measuring how sensitive the sensor/film is to light itself.
The key to a perfectly exposed image? – Hitting the right balance of those elements. Now, this is not a “photography 101” post, so I’m not going into anything in detail, but suffice it to say, if I alter one of them, the others need to adjust to accommodate. So, if I increase the amount of light let through the lens (and also reduce the depth of field/amount of the shot in focus) I have to do something with either reducing the amount of time that light is allowed in for (shutter speed) or use a less light-sensitive film speed (ISO). Likewise, if I want to freeze a moving object as crisp and sharp as possible, I may have to reduce the shutter time to a tiny fraction of a second – but that means either increasing the amount of light let into the lens via an aperture change (which could affect sharpness) or increasing the sensitivity of the film/sensor (ISO), which in turn gives us a nasty by-product : noise.
So, back to landscapes, imagine this…
I want to shoot a bright scene – a sunset, looking straight into the sun. That would normally mean a very fast shutter speed and narrow aperture. The only problem is, I also want to see the movement in the water or sky. Now, I could reduce my ISO/film speed right down, to 100 or 50, but still that gives me a shutter speed of around 1/15th of a second at a reasonable landscape aperture setting of f/16. So, what if we reduce the aperture down to f/22 (the smallest some cameras and lenses will go)? Well, that’s going to get me to about 1/8th of a second – hardly the realm of “motion blur”, hey?
And there’s the problem. With my aperture closed all the way down, and ISO set to as insensitive as it can be, my shutter speed is still limited to a split second – enter the neutral density filter!
What is an ND or ND-Grad filter? Easy – it does exactly what it says on the tin. The “neutral” is key : it doesn’t affect colour in ANY way. Instead, it reduces the amount of light entering the lens, by x number of f-stops (effectively, aperture settings). For example, an ND-8 reduces light by “3 stops” – meaning what I was previously shooting at f/22, I would now need f/8 – or more importantly, I could shoot at f/22 for a whole second and still have the same exposure as if I’d shot for 1/8th of a second without it.
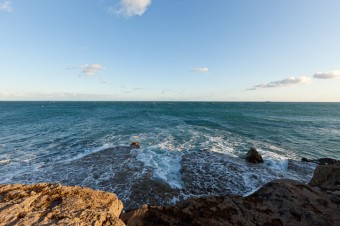
Bingo! So, to save the pain of typing a lot more, I shot a few quick example images while on Portland shooting the top photograph in this post at the weekend. They’re NOT meant to be good photos, but I took the opportunity to grab some images in context to help me explain.
So, to the right, we have a normal image of the sea. It was pretty rough when I got there, and this doesn’t do it justice, but shot straight out of the camera’s meter at f/14, at ISO 100, I got a 1/40th of a second exposure – enough to freeze the water (which may have been the intention).
The challenge is, for landscape/atmospheric shots, that’s rarely the intention. Even a wave crashing over a cliff top needs some movement, but even at f/22, I’m only going to get around 1/15th of a second – which won’t deliver motion.
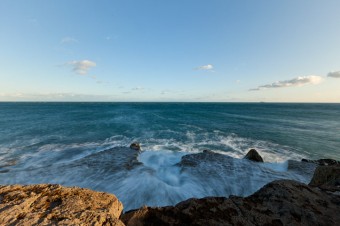 Let’s take that exact same shot with an ND-64 on it (which is the equivalent of 8 stops of light being cut, or a 1.3 second exposure)
The waves are now clearly moving, you can see the motion in the water’s path and I can start to build some atmosphere around it. Now, imagine how powerful that filter can be when the light’s fading. That image of the lighthouse at the top of this post is a 75 second exposure, and it’s still eerily dark! Want to see how much the water was blurred? – Take a look at this image on Facebook which I took of what the sea was actually doing!
So what about this “ND-Grad” thing? Well, that’s simple too, really. You see, for sunrises and sunsets, you end up with another problem: The image is too bright in the top half and too dark in the bottom. An ND-Grad (or Neutral Density Graduated) filter gives us a way around that:
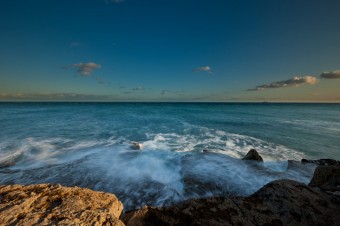
And here it is. They come in varieties of different transitions between cutting out light and allowing it through – the “gradient” – and are expressed in terms of “hard” and “soft”. The one on the right is a hard grad (a 2-stop grad on top of the ND-64 8 stop ND) and you’ll see that when it’s lined up with the horizon it can really make a difference to the feel of the bright sky without impacting the bottom.
Just be aware – ANYTHING over that horizon line will be affected. Use it on the top shot of the lighthouse in this post, and the lighthouse itself gets darkened – ooops!
So there we have it, a whistle-stop tour (in the easiest way I think I can explain it) of the neutral-density filters. The range out there is massive and you’ll find offerings from all the big names – Hoya, Cokin, Lee and others. Oh, and while I mention Lee, they’re the owners of one of the most often sworn-by ND filters out there for long exposures: “The Big Stopper” (a 10 stop ND – or, effectively, an “ND1024”!)
What’s really funny, to me, is that while you CAN add on colour filter effects “after the event” (in Photoshop), there are quite often serious limits to what a camera can physically do with the light it is given. While those photographers out there with their filter kits are often looked upon as “old school”, some simple rules of physics say that without limiting or altering the amount of light hitting a sensor (with current camera constraints) it’s simply not possible to get some of those amazing images without the use of such filters at the time of capture.
And if ever there was a benchmark for how much ND filters are (or should be) used? Well, I found out by accident while in Hong Kong last week, that my little Canon Powershot S100 (considered a consumer camera, not like my DSLR kit) has a neat little feature over its predecessor. That’s right – an internal, user-selectable, neutral density filter! Without which, the sea in this rather eerie shot of the skyline would just look a mess.
Just one final thought – if anyone wants to really go to town and get on with some long exposure work, check out this chart, courtesy of David on flickr. Yes, that’s right – there’s a filter out there which allows you to take a year long exposure.
If anyone tries it, give me a call in about 11.9 months’ time 😉
